Master Vintage Electronics Restoration for Optimal Performance
Restoring vintage electronics is more than a trip down memory lane. Some classic devices hide decades-old mysteries behind their faded panels and forgotten switches. But while you might expect them to be full of lost potential, most restoration projects reveal that up to 70 percent of issues are caused by something as simple as dirty, corroded components or aged solder joints. The real surprise is just how much function and beauty you can revive with patience and the right approach.
Table of Contents
- Step 1: Evaluate Your Vintage Electronics Condition
- Step 2: Gather Necessary Tools and Materials
- Step 3: Disassemble Carefully and Document Components
- Step 4: Clean and Restore Each Component
- Step 5: Reassemble and Test the Equipment
- Step 6: Verify Functionality and Make Adjustments
Quick Summary
| Key Point | Explanation |
|---|---|
| 1. Thorough Evaluation is Crucial | Start restoration by inspecting your vintage electronics for physical and functional integrity, marking potential challenges early on. |
| 2. Assemble the Right Tools | Gather quality tools like precision screwdrivers, soldering equipment, and cleaning supplies to ensure safe and effective restoration. |
| 3. Document Disassembly Process | Take photos and make notes during disassembly to create a reference for reassembly, ensuring accurate reconstruction later. |
| 4. Clean Components with Care | Use appropriate cleaning agents and gentle techniques to remove oxidation and grime, restoring functionality without damaging delicate parts. |
| 5. Systematic Testing and Calibration | After reassembly, conduct thorough testing and make precise calibrations to ensure each device functions correctly and meets original specifications. |
Step 1: Evaluate Your Vintage Electronics Condition
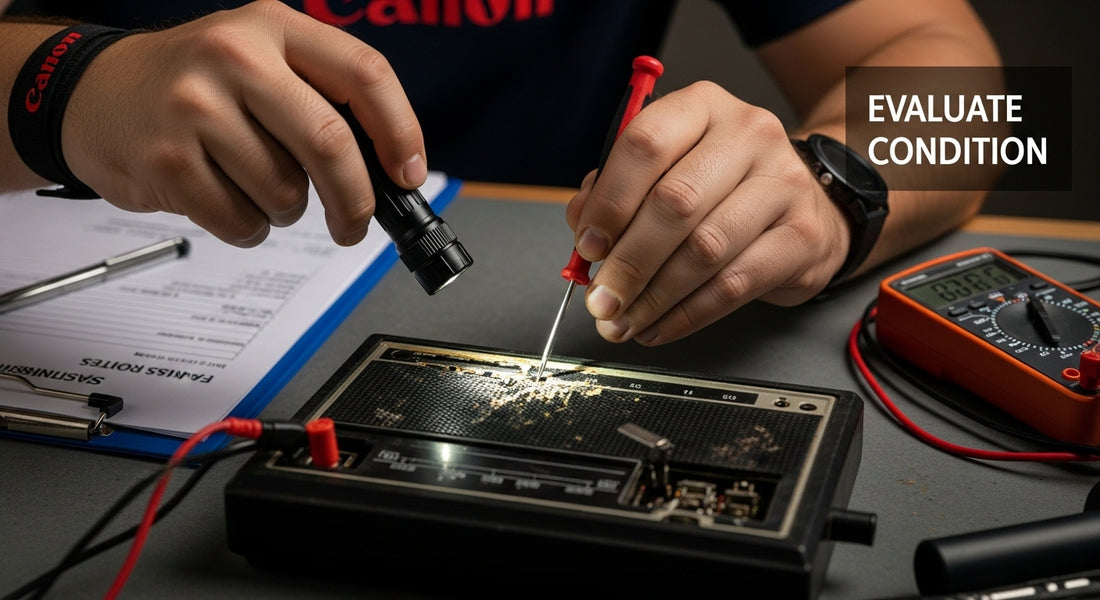
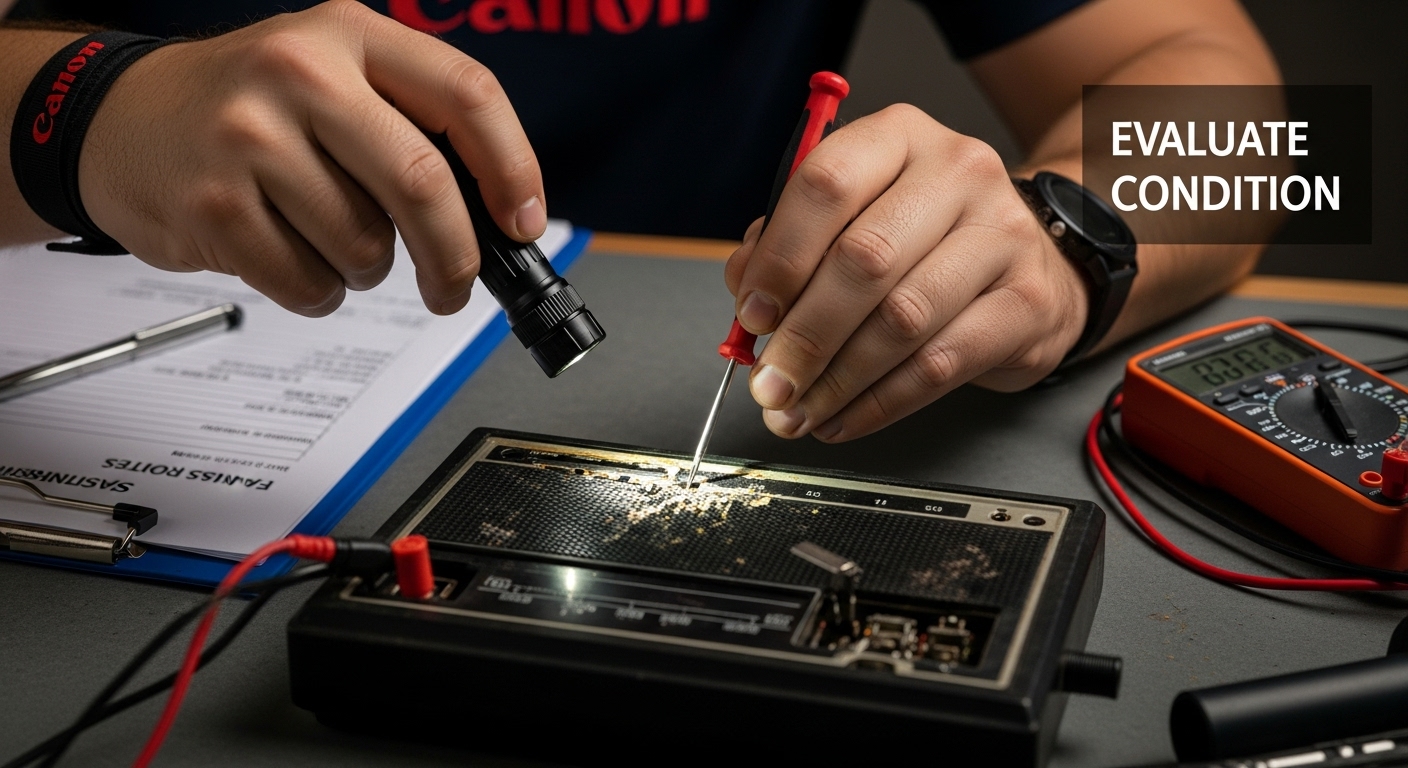
Beginning your vintage electronics restoration journey requires a meticulous initial assessment that determines the potential and feasibility of your project. The evaluation process serves as the critical foundation for all subsequent restoration efforts, providing crucial insights into the device’s structural integrity, functional capabilities, and potential challenges.
Your first task involves conducting a comprehensive visual and functional inspection. Start by carefully examining the external surfaces of the vintage electronic device, looking for signs of physical damage such as cracks, rust, corrosion, or significant wear. Pay close attention to intricate details like connection points, switches, knobs, and ports. These areas often reveal the most about the device’s overall condition and potential restoration complexity.
Next, perform a systematic internal examination. If possible, safely open the device using appropriate tools like precision screwdrivers or specialized electronics opening kits. Inspect internal components for signs of decay, such as corroded circuit boards, degraded capacitors, or evidence of previous amateur repair attempts. Vintage electronics often suffer from aged solder joints, dried-out insulation, and component breakdown, which can significantly impact restoration potential.
Functional testing represents another crucial evaluation aspect. Before attempting any powered tests, check for obvious electrical hazards. Gently test mechanical components like switches, buttons, and moving parts to assess their responsiveness. When ready to power on, use a carefully controlled power source with appropriate voltage regulation to minimize potential damage. Document any observed performance issues, unusual sounds, or intermittent functionality.
If you want more detailed guidance on handling delicate vintage electronics, read our comprehensive guide on cleaning old electronics. This additional resource can provide valuable insights into careful handling techniques.
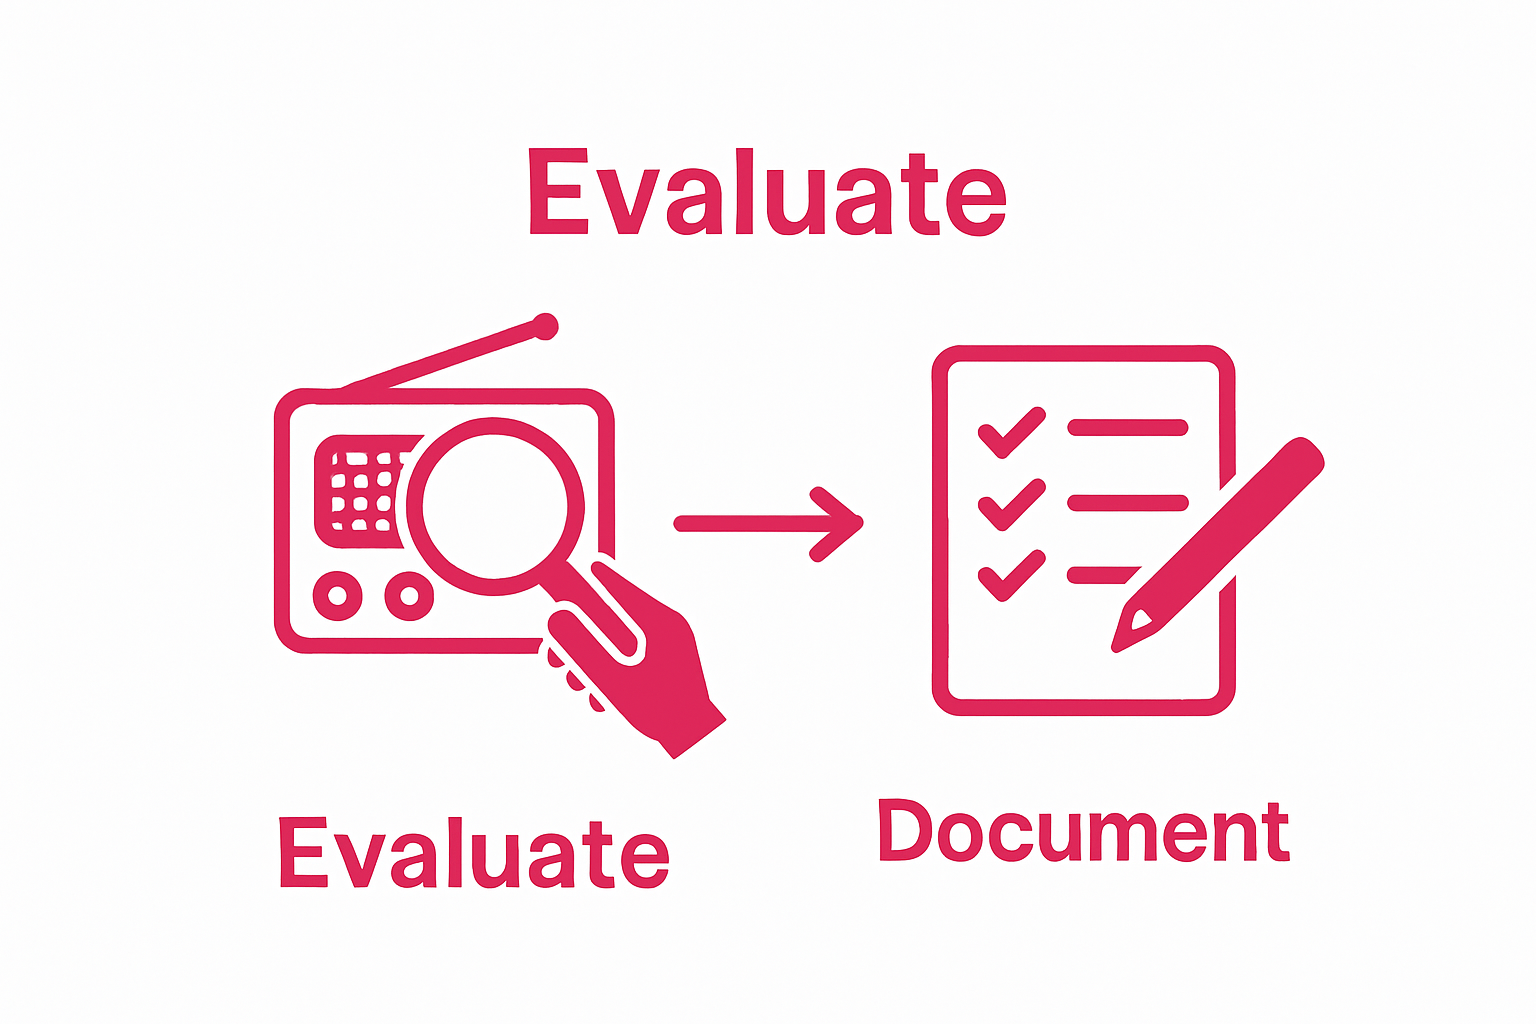
Successful evaluation requires patience and systematic observation. Create a detailed assessment document recording your findings, including:
- Physical condition details
- Functional test results
- Identified potential restoration challenges
- Estimated component replacement requirements
Remember that not all vintage electronics are suitable for complete restoration. Some devices might be better preserved as display pieces or used for parts. Your thorough evaluation will help determine the most appropriate path forward in your vintage electronics restoration project.
This table provides a step-by-step summary of the vintage electronics restoration process, outlining each stage, the key activity involved, and the primary goal to help guide your workflow.
| Step | Main Activity | Key Outcome |
|---|---|---|
| 1. Evaluate Device Condition | Inspect visually and functionally | Assess feasibility and identify major issues |
| 2. Gather Tools & Materials | Assemble required toolkit and supplies | Ensure readiness for safe, precise restoration |
| 3. Disassemble & Document | Carefully take apart, record components | Organised reference for accurate reassembly |
| 4. Clean & Restore Components | Use specialist cleaning techniques | Remove grime, corrosion, and restore parts |
| 5. Reassemble & Initial Testing | Rebuild device and check functionality | Confirm all connections and basic operation |
| 6. Verify & Calibrate | Final tests and fine adjustments | Achieve original performance and reliability |
Step 2: Gather Necessary Tools and Materials
Preparing for vintage electronics restoration requires assembling a precise toolkit that balances precision, safety, and specialized functionality. Your success depends not just on skill, but on having the right equipment to handle delicate vintage components with care and expertise.
Professional restoration demands an investment in quality tools that protect both you and the electronic device. Begin by acquiring essential safety equipment, including anti-static wrist straps, safety glasses, and insulated gloves. These items prevent potential electrical hazards and protect sensitive electronic components from static discharge that could permanently damage fragile circuits.
Your core toolkit should include precision screwdriver sets with multiple head types, including flathead and Phillips head in various sizes. Invest in high-quality ceramic-tipped tweezers for manipulating small components, needle-nose pliers with non-conductive handles, and a reliable multimeter capable of measuring voltage, resistance, and continuity. Soldering equipment represents another critical investment - choose a temperature-controlled soldering station with fine-tipped irons that allow delicate work on vintage circuit boards.
For cleaning and maintenance, gather specialized supplies like isopropyl alcohol, anti-static brushes, compressed air dusters, and lint-free microfiber cloths. Thermal paste, contact cleaner, and specialized electronics cleaning solutions will help restore and protect delicate components. Consider acquiring a magnifying headset or precision magnifying glass to inspect intricate details that might escape normal visual examination.
Check out our guide on collecting retro tech for additional insights into selecting and maintaining vintage electronic equipment.
Key tools for your vintage electronics restoration toolkit include:
- Precision screwdriver set
- Temperature-controlled soldering station
- Digital multimeter
- Anti-static wrist strap
- Ceramic-tipped tweezers
- Compressed air duster
- Isopropyl alcohol (high purity)
- Magnifying headset
Remember that building your toolkit is an ongoing process. Start with fundamental items and gradually expand your collection as you gain experience with different vintage electronics restoration projects. Quality tools represent an investment in both your safety and the successful preservation of historical electronic devices.
Here is a concise overview of the essential tools and materials needed for vintage electronics restoration, summarising their main function and purpose in the restoration workflow.
| Tool/Material | Purpose | Special Notes |
|---|---|---|
| Precision screwdriver set | Remove and assemble components | Multiple head types for versatility |
| Temperature-controlled soldering station | Solder and desolder connections | Fine tips for delicate work |
| Digital multimeter | Measure voltage, resistance, continuity | Essential for diagnostics |
| Anti-static wrist strap | Prevent static discharge damage | Critical for sensitive electronics |
| Ceramic-tipped tweezers | Handle small components safely | Non-conductive, reduces risk of shorts |
| Isopropyl alcohol (high purity) | Clean circuit boards and parts | Use 90% or higher for best results |
| Compressed air duster | Remove dust from tight spaces | Use at safe distance to avoid damage |
| Magnifying headset | Enhance visual inspection | Helpful for spotting fine details |
Step 3: Disassemble Carefully and Document Components
Disassembling vintage electronics represents a critical phase that demands surgical precision, patience, and meticulous documentation. Your goal is to create a comprehensive map of the device’s internal architecture while minimizing potential damage to delicate components.
Preparation is paramount before initiating any disassembly. Ensure your workspace is clean, well-lit, and static-free. Lay out a large white or light-colored cloth to provide clear visibility and prevent small components from getting lost. Organize your precision tools within easy reach, including magnetic screw trays, specialized screwdrivers, and anti-static containers for storing removed parts.
Begin the disassembly process by carefully removing external casings and panels. Work systematically, starting from the outermost layers and progressively moving inward. Take high-resolution photographs at each stage of deconstruction. Digital documentation is crucial - capture images from multiple angles, ensuring clear visibility of connections, component placements, and potential wear patterns. Consider using a digital camera or smartphone with macro capabilities to capture intricate details.
As you remove each component, create a detailed log documenting its location, condition, and potential replacement requirements. Use numbered labels or color-coded stickers to track individual parts, creating a reference system that will prove invaluable during reassembly. Pay special attention to fragile components like capacitors, transistors, and circuit board connections. Handle these with ceramic tweezers and maintain an anti-static environment to prevent electrical damage.
Learn more about displaying and preserving your vintage tech collection for additional insights into maintaining the aesthetic and functional value of your restored electronics.
Key documentation recommendations include:
- Photograph each disassembly stage
- Create a digital spreadsheet tracking component details
- Label and organize removed parts systematically
- Note any signs of wear or potential replacement needs
- Sketch or diagram complex connection points
Remember that vintage electronics restoration is as much an art as a science. Your patience and attention to detail during the disassembly process will directly influence the success of your restoration project. Approach each step with deliberate care, treating every component as a precious historical artifact.
Step 4: Clean and Restore Each Component
Cleaning and restoring vintage electronic components requires a delicate balance of precision, patience, and specialized techniques. This critical stage transforms potentially damaged parts into functional treasures, breathing new life into historical electronic devices.
Ultrapure cleaning solutions and gentle techniques are essential when addressing vintage electronics. Begin by selecting appropriate cleaning agents specifically designed for electronic components. High-concentration isopropyl alcohol represents your primary cleaning solution, offering excellent degreasing capabilities without leaving residue. Use lint-free microfiber cloths and soft-bristled anti-static brushes to remove dust, oxidation, and accumulated grime from circuit boards and delicate mechanical parts.
Circuit board restoration demands extraordinary care. Examine each board carefully for signs of corrosion, broken traces, or compromised solder joints. Use specialized electronics cleaning solutions to remove oxidation, applying minimal moisture and allowing surfaces to dry completely. Compressed air can help remove stubborn dust from intricate areas, but maintain a consistent distance to prevent potential damage. Ceramic tweezers and precision tools will be your best allies in navigating complex restoration processes.
Mechanical components like switches, potentiometers, and connectors require targeted cleaning approaches. Contact cleaner sprays designed for electronics can help remove accumulated residue and restore electrical conductivity. Gently work switches and rotating mechanisms to distribute cleaning solution and eliminate potential binding or degradation. Pay special attention to areas prone to oxidation, using fine-grained cleaning techniques that preserve original manufacturing integrity.
Learn more about maintaining your vintage tech collection for additional insights into preserving historical electronic devices.
Key restoration cleaning recommendations include:
- Use 90% or higher concentration isopropyl alcohol
- Apply cleaning solutions with lint-free microfiber cloths
- Work in a well-ventilated, static-free environment
- Allow components to dry completely before reassembly
- Inspect thoroughly after cleaning for any remaining residue
Remember that restoration is an art form requiring patience and precision. Each cleaned component represents a small victory in preserving technological history, transforming potentially discarded electronics into functional, remarkable pieces of heritage.
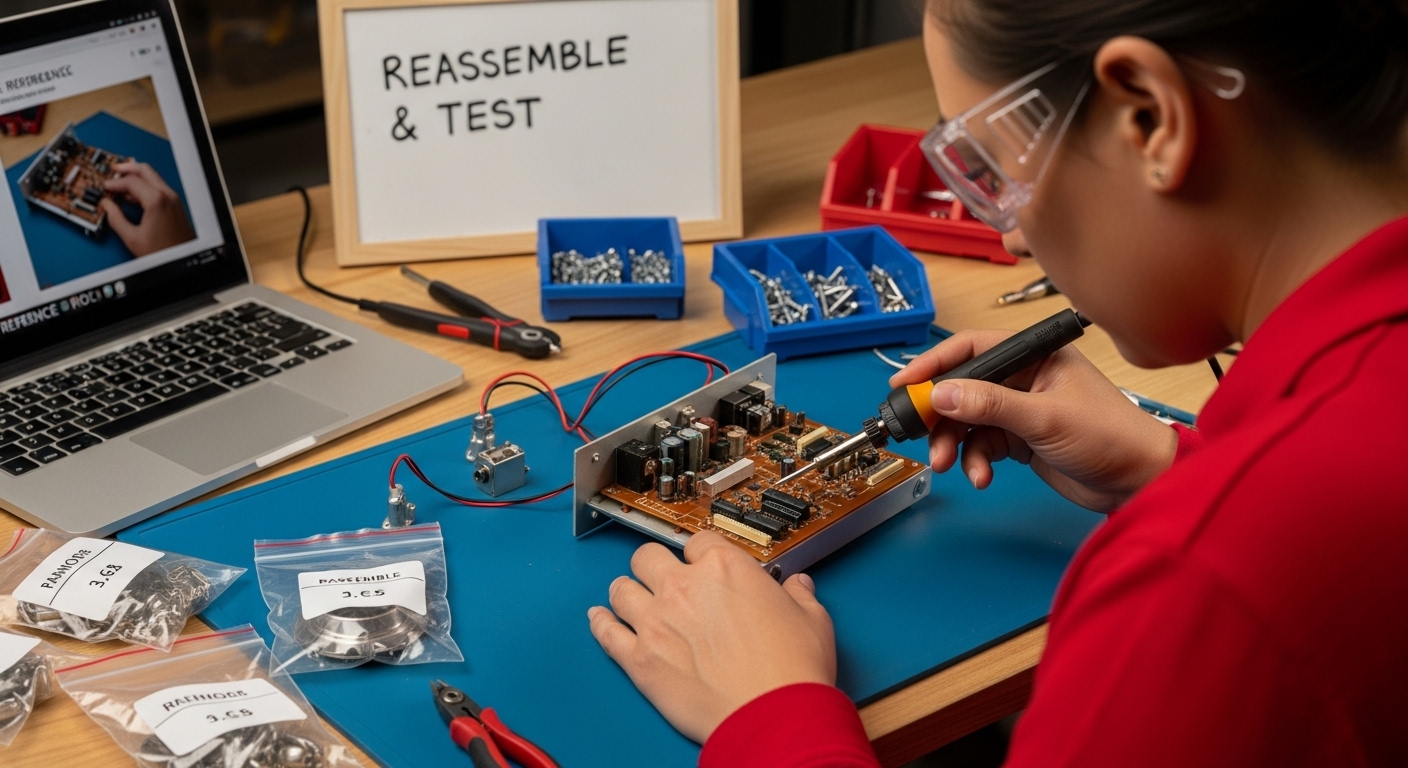
Step 5: Reassemble and Test the Equipment
Reassembling vintage electronics represents the culmination of your restoration journey, where precision and methodical approach transform carefully restored components back into a functional device. This stage demands the same level of attention and care you applied during the initial disassembly process.
Systematic reassembly is crucial to successful vintage electronics restoration. Begin by carefully reviewing your documentation and photographs from earlier stages, using them as a precise roadmap for reconstruction. Start with the most fundamental components, working systematically from the circuit board outward. Ensure each connection is clean, properly aligned, and secured using fresh solder or appropriate fastening mechanisms. Pay extraordinary attention to delicate components like capacitors, transistors, and integrated circuits, making certain they are seated correctly and free from potential stress points.
Before completing the final external assembly, conduct initial electrical testing using a multimeter to verify continuity and resistance across critical circuit pathways. Gradual power introduction is essential when testing restored vintage electronics. Utilize a variable voltage power supply that allows incremental current increases, preventing potential catastrophic failures. Start with minimal voltage, carefully monitoring the device’s response and checking for any unexpected heat generation, unusual sounds, or erratic behavior.
Implement a comprehensive testing protocol that mimics the device’s original operational conditions. If restoring an audio amplifier, connect appropriate speakers and test across various frequency ranges. For vintage computing equipment, verify input-output functionality, memory operations, and system responsiveness. Document your testing process meticulously, recording voltage readings, performance characteristics, and any anomalies encountered during the initial power-up stages.
Discover more about displaying and preserving your restored vintage tech to showcase your restoration achievements.
Key reassembly and testing recommendations include:
- Refer to original documentation and photographs
- Use clean, precise soldering techniques
- Test electrical connections before final assembly
- Introduce power gradually and incrementally
- Monitor device performance across multiple operational scenarios
Remember that successful vintage electronics restoration is a blend of technical skill, patience, and respect for historical technological artifacts. Each successfully restored device represents a bridge between technological past and present, preserving unique engineering heritage for future generations to appreciate and understand.
Step 6: Verify Functionality and Make Adjustments
Verifying functionality represents the ultimate validation of your vintage electronics restoration efforts, transforming meticulous technical work into a living, operational piece of technological history. This critical stage demands systematic testing, precise calibration, and a nuanced understanding of historical electronic design principles.
Comprehensive functionality testing requires a methodical, multi-stage approach. Begin by establishing a controlled testing environment with appropriate measurement tools like oscilloscopes, multimeters, and specialized diagnostic equipment. Create a structured testing protocol that examines each electronic function systematically, comparing performance against original manufacturer specifications or historical documentation. For audio equipment, this might involve analyzing frequency response, signal-to-noise ratio, and harmonic distortion. Computing devices require thorough memory, processing, and input-output testing to confirm complete operational integrity.
Calibration represents a delicate art in vintage electronics restoration. Many historical devices feature manual adjustment points like potentiometers and trim capacitors that require precise manipulation. Use precision screwdrivers and calibration tools to make minute adjustments, always working in small increments and carefully monitoring performance changes. Temperature, humidity, and electrical load can significantly impact calibration, so conduct tests under stable environmental conditions to ensure accurate results.
Documentation becomes crucial during this verification stage. Maintain a detailed log recording initial test results, specific adjustments made, and subsequent performance improvements. Photograph adjustment points and record exact settings, creating a comprehensive reference for future maintenance or potential restoration attempts. Some vintage electronics might require specialized knowledge or original service manuals to achieve optimal calibration, so research and consultation with expert communities can provide invaluable insights.
Explore our guide on displaying and preserving vintage tech collections for additional insights into maintaining restored electronic artifacts.
Key verification and adjustment recommendations include:
- Use professional-grade testing equipment
- Compare performance against original specifications
- Make incremental calibration adjustments
- Document all testing and adjustment processes
- Conduct tests under stable environmental conditions
Remember that successful vintage electronics restoration transcends mere technical repair. Each carefully restored device represents a bridge connecting technological past and present, preserving unique engineering achievements for future generations to appreciate and understand.
Take Your Vintage Restoration Further with OnlyRetro’s Retro Tech Solutions
You have just mastered the art of vintage electronics restoration, navigating everything from aging solder joints to calibrating classic circuits. After investing hours assessing condition and sourcing quality tools, you know how vital reliable components and the right accessories are for achieving top results. But, keeping your restored gems looking great and functioning optimally is just as important as your restoration skill.
Explore the unique collection at OnlyRetro to elevate your restoration project or showcase your finished work. Whether you need specialised cases for protection, stylish display solutions, or modern retro-inspired gadgets to pair with your collection, our curated range is tailored for tech enthusiasts and collectors in South Africa. Make your talents go even further by browsing our selection for the perfect finishing touches. Ready to complete your project? Visit OnlyRetro today and find the essentials you need to preserve and display your vintage electronics with pride.
Frequently Asked Questions
How do I evaluate the condition of my vintage electronics before restoration?
Begin by conducting a comprehensive visual and functional inspection of the device. Look for physical damage, perform internal examinations, and carry out functional tests to assess its overall condition.
What tools are essential for vintage electronics restoration?
Key tools include a precision screwdriver set, a temperature-controlled soldering station, a digital multimeter, anti-static wrist straps, ceramic-tipped tweezers, and high-purity isopropyl alcohol for cleaning.
What cleaning techniques should I use for electronic components?
Use ultrapure cleaning solutions like isopropyl alcohol, lint-free microfiber cloths, and anti-static brushes. Be gentle and avoid excessive moisture, allowing components to dry completely before reassembly.
How do I test the functionality of restored vintage electronics?
Establish a controlled testing environment with the proper measurement tools, create a structured testing protocol to examine each function, compare performance against original specifications, and document all adjustments made during the process.